How to Set Up a Chatbot for WordPress (2026 Guide)
In today’s fast-paced digital landscape, website visitors expect instant answers. A 2026 study by Digital Dynamics revealed that 79% of online consumers prefer websites with live chat or chatbot support for immediate assistance. For WordPress site owners, this means that failing to provide instant support is no longer an option. This guide will show you exactly how to set up a chatbot for WordPress, transforming your user experience and boosting your operational efficiency.
Why Your WordPress Site Needs a Chatbot in 2026
Before diving into the setup process, it’s essential to understand the value an AI chatbot brings to your website. Gone are the days of clunky, script-based bots. Modern AI agents are intelligent, context-aware, and capable of handling complex interactions. They are no longer a novelty but a core component of a successful digital strategy.
Key benefits include:
- 24/7 Customer Support: An AI chatbot works around the clock, answering questions and assisting users even when your team is offline.
- Increased Lead Generation: Proactively engage visitors, qualify leads, and even schedule appointments automatically.
- Reduced Support Costs: Automate responses to frequently asked questions, freeing up your human agents to handle more complex issues.
- Enhanced User Experience: Provide immediate, accurate answers, guiding users to the information they need without frustration.
How to Set Up a Chatbot for WordPress: A Step-by-Step Guide
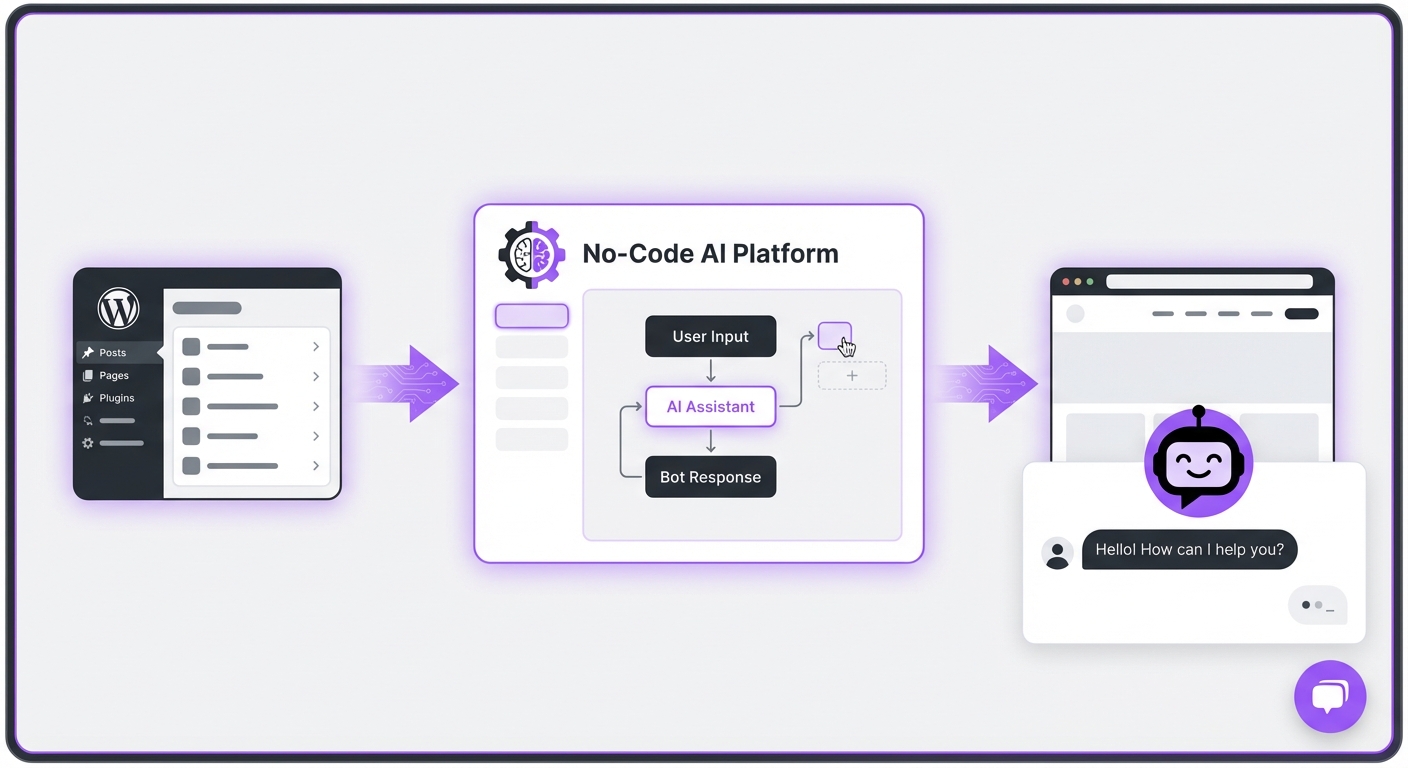
Integrating a powerful AI assistant into your WordPress site is more straightforward than you might think, especially with modern no-code solutions. Follow these steps to get started.
Step 1: Define Your Chatbot’s Goals
First, clarify what you want your chatbot to achieve. A chatbot without a clear purpose will be ineffective. Consider your primary business objectives:
- Do you want to reduce the number of support tickets?
- Is your goal to capture more leads from website traffic?
- Do you need to help users navigate your products or services?
- Should it book appointments or consultations?
Step 2: Choose the Right Chatbot Plugin
The WordPress ecosystem is filled with plugins, but not all are created equal. For a seamless and powerful integration in 2026, look for a solution that offers:
- A No-Code Interface: You shouldn’t need a developer to build and manage your chatbot.
- Advanced AI Capabilities: Look for features like Retrieval-Augmented Generation (RAG) technology, which ensures the bot provides answers based strictly on your provided data, preventing inaccuracies.
- Deep WordPress Integration: The tool should feel like a native part of your WordPress dashboard, not a tacked-on third-party script.
- Customization Options: The chatbot’s appearance should be easily customizable to match your brand identity.
Step 3: Install and Activate the Plugin
Once you’ve chosen your plugin, the installation process is standard for any WordPress site.
- Navigate to your WordPress dashboard.
- Go to Plugins > Add New.
- Search for your chosen chatbot plugin (e.g., MxChat) or click Upload Plugin if you have a .zip file.
- Click Install Now, and then Activate.
Step 4: Configure Your Chatbot’s Core Settings
After activation, you’ll be guided through the initial setup. This typically involves:
- Creating Your First Agent: Give your chatbot a name and a personality (e.g., friendly, professional, formal).
- Setting a Welcome Message: Craft a compelling opening message that greets users and explains what the chatbot can help with.
- Connecting to an AI Model: Choose the underlying AI engine. Modern platforms allow you to select from various models to find the best fit for your needs.
Step 5: Train Your AI Chatbot with Your Data
This is the most critical step for ensuring your chatbot is genuinely helpful. An untrained chatbot is just an empty shell. You need to provide it with the knowledge it will use to answer user questions.
Common training methods include:
- Website Crawling: Allow the tool to automatically scan your website pages and absorb the information.
- Document Uploads: Feed the chatbot your existing knowledge base, FAQs, product manuals, and support documents.
- Text Input: Simply paste relevant text directly into the training interface.
Step 6: Customize the Chatbot’s Appearance
To create a seamless user experience, your chatbot widget must align with your website’s branding. In the plugin’s settings, you can typically customize:
- Colors: Match the chat icon, header, and message bubbles to your brand palette.
- Avatar: Upload a logo or an image to represent your chatbot.
- Position: Choose where the chat widget appears on your site (e.g., bottom-right, bottom-left).
Step 7: Test and Deploy Your Chatbot
Before unleashing your chatbot on live visitors, test it thoroughly. Open an incognito window and interact with it as a real user would. Ask common questions, try to trick it with difficult queries, and test any lead capture or booking functions.
Once you are confident in its performance, you can deploy it across your entire website or on specific pages through the plugin’s display settings.
Common Mistakes to Avoid When Adding a Chatbot to WordPress
Knowing how to set up a chatbot for WordPress also means knowing what pitfalls to avoid. Steer clear of these common mistakes:
- Ignoring a Clear Goal: Deploying a chatbot “just because” without a defined purpose leads to a poor user experience.
- A “Set It and Forget It” Mindset: Regularly review chat logs to identify areas for improvement and update your chatbot’s knowledge base as your business evolves.
- Hiding Human Escalation: Always provide a clear and easy way for users to connect with a human agent if the chatbot cannot resolve their issue.
- Poor Onboarding: A confusing or generic welcome message will deter users from engaging with the bot.
Expected Results After Launching Your WordPress Chatbot
After successfully setting up your chatbot, you can expect to see tangible results. Initially, you’ll notice an increase in user engagement as visitors interact with the new tool. Over the first few weeks, you should see a measurable reduction in repetitive support inquiries, as the bot handles them automatically.
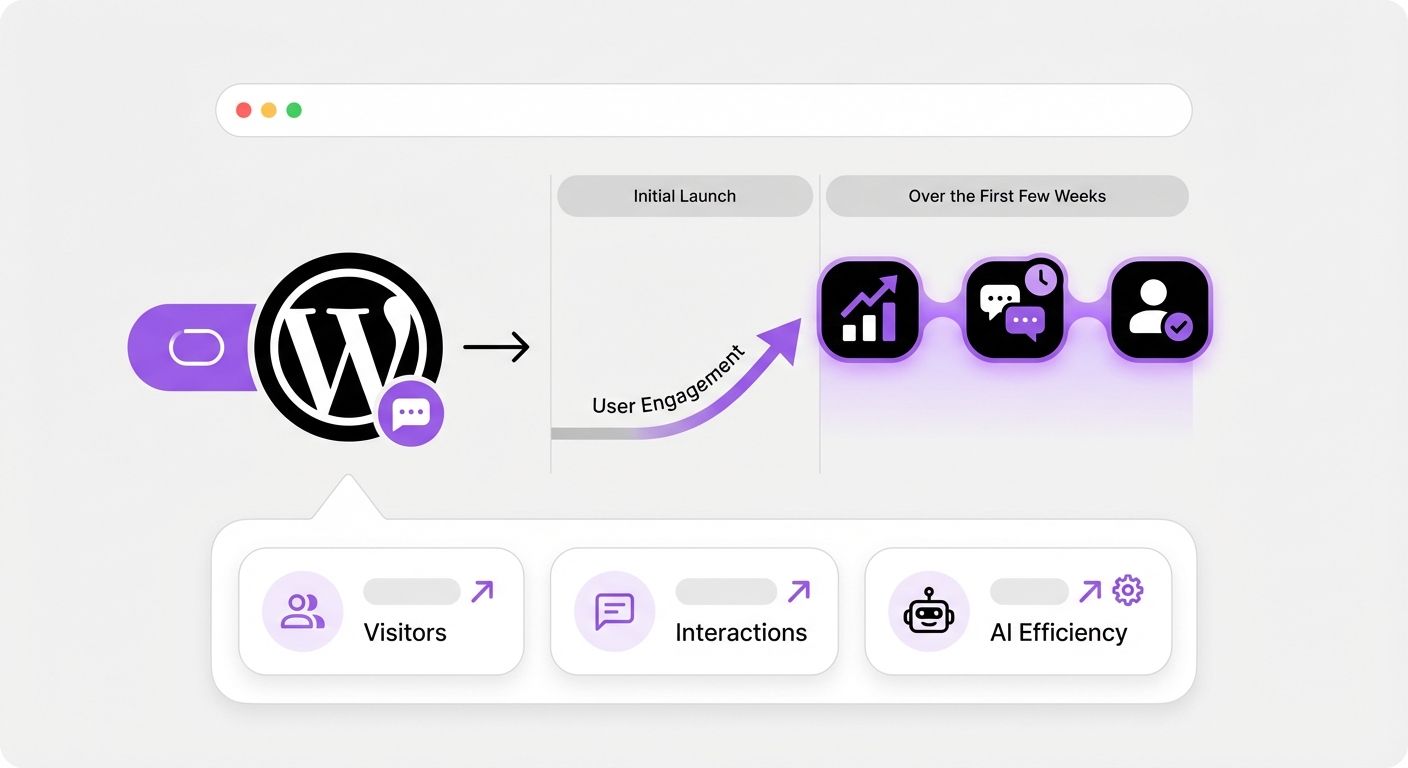
Long-term, a well-trained chatbot will become a powerful asset for lead generation, customer satisfaction, and providing valuable insights into what your customers are looking for on your site.
Elevate Your WordPress Site with an AI Chatbot
Setting up a chatbot on your WordPress site in 2026 is an essential step toward meeting modern customer expectations. By following a clear process—defining goals, choosing the right tool, training it with quality data, and testing thoroughly—you can create a valuable digital assistant.
With powerful, no-code solutions like MxChat designed specifically for WordPress, implementing an intelligent AI agent has never been more accessible. You can enhance your customer support, capture more leads, and start reaping the benefits of automation today.