Making a Bot with MxChat on WordPress
Building a bot for your website is a big move, and it all starts with one crucial question before you even think about plugins or code. Do you go with a local model for rock-solid data privacy, or do you tap into the raw power of a cloud-based API? This single decision sets the stage for everything that follows.
Laying the Groundwork for Your AI Bot
Before we get into the nuts and bolts of the setup, let's talk strategy. The very first thing you need to decide when making a bot is what will power it. You've got two main roads you can take: run an AI model on your own server (we'll call this "local") or connect to an external service like OpenAI's API ("cloud").
A local model, like Llama 3, means you have complete control over your data. For anyone in healthcare, finance, or any industry where privacy is king, this isn't just a nice-to-have; it's a must. The catch? You'll need a beefy server with a good GPU, which can mean a serious upfront investment.
On the flip side, using a cloud API gives you instant access to incredibly powerful, state-of-the-art models without needing any special hardware on your end. This is a fantastic option if you need to scale up quickly or if you're building a complex sales assistant that needs to handle a lot of conversations. The trade-off here is that your data gets processed on someone else's servers.
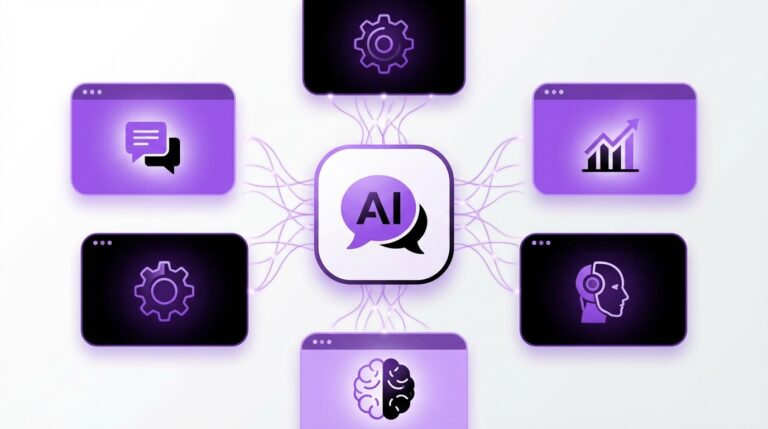
This infographic helps visualize the core trade-offs you'll be weighing.
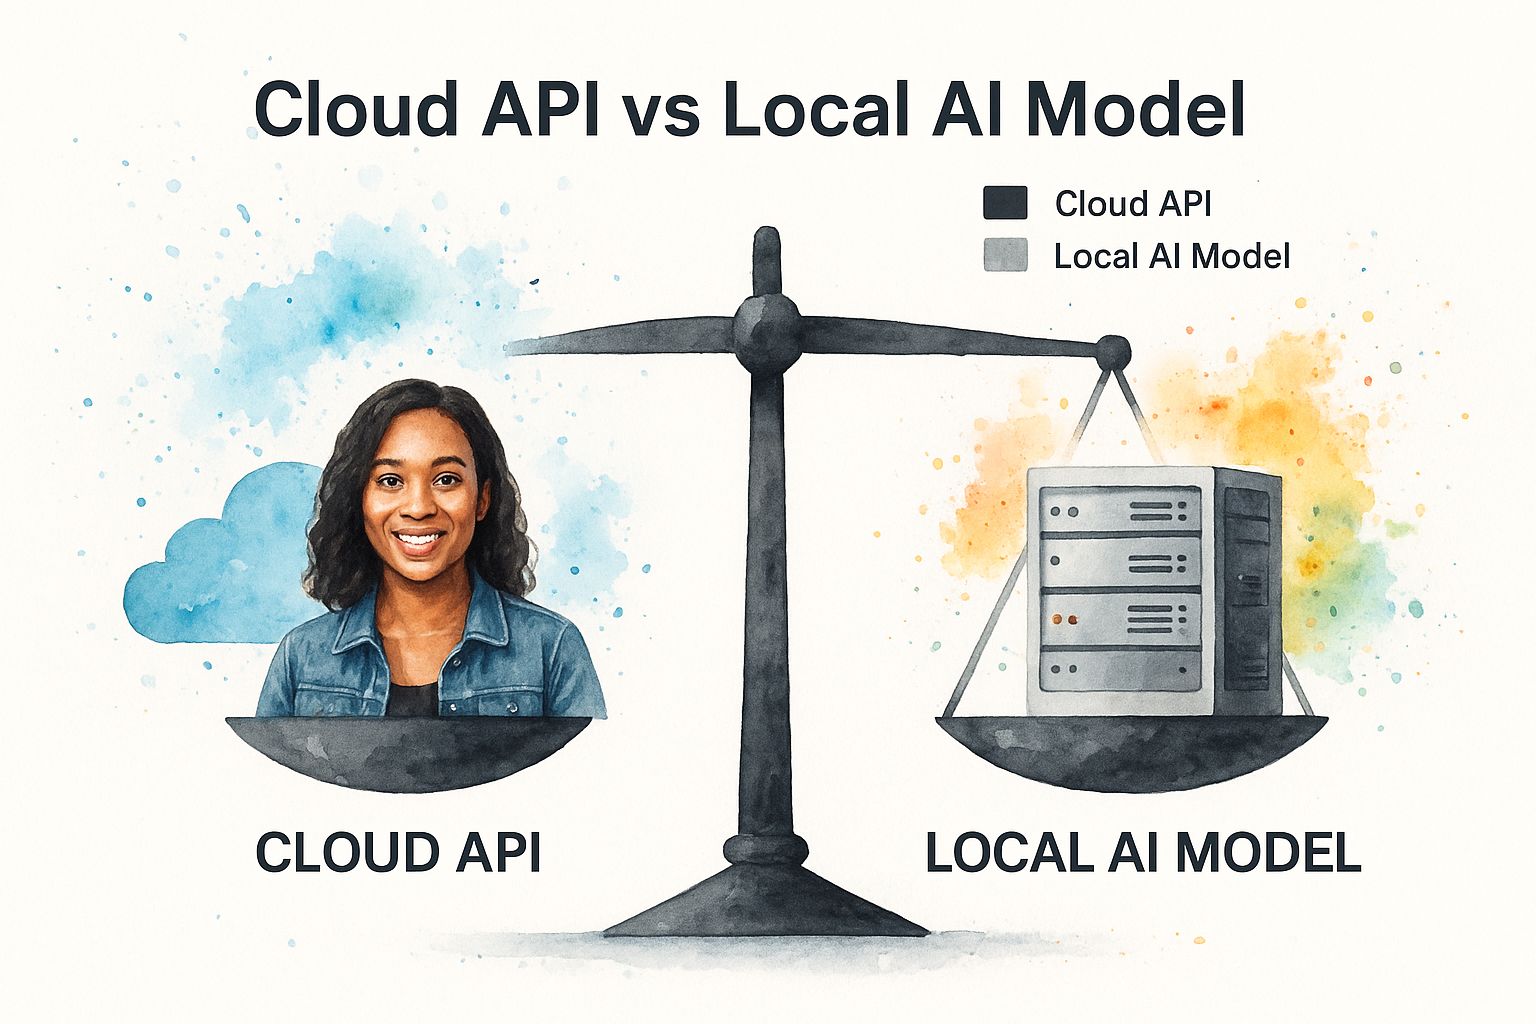
As you can see, it's all about finding the right balance between the control you get with a local setup and the sheer convenience of a cloud API.
Choosing the Right AI Model for Your Bot
To make this choice a little easier, here's a quick comparison to help you decide between local and cloud-based AI models for your chatbot.
| Feature | Local Models (e.g., Llama 3) | Cloud Models (e.g., OpenAI API) |
|---|---|---|
| Data Privacy | Maximum privacy; data never leaves your server. | Data is sent to a third party for processing. |
| Hardware | Requires powerful server with a GPU. | No special hardware needed on your end. |
| Cost | High upfront hardware cost, but no ongoing API fees. | Pay-as-you-go based on usage; can scale. |
| Performance | Limited by your own hardware capabilities. | Access to the most powerful models available. |
| Setup | More complex initial setup and maintenance. | Simpler to integrate via API calls. |
| Best For | Industries with strict data compliance (finance, healthcare). | Businesses needing top performance and scalability. |
Ultimately, the best model is the one that fits your specific needs for security, performance, and budget.
Aligning Your Choice With Business Goals
Think about what you actually need this bot to do. Are you just building a simple FAQ bot to handle common questions? A cloud API might be overkill, and a smaller, more efficient local model could save you money. But if you're aiming for a sophisticated tool that can qualify leads and guide customers through a sales funnel, the advanced reasoning of a top-tier cloud model is worth its weight in gold.
The benefits of chatbots for business are directly tied to how well the technology fits the job you've given it.
Key Takeaway: The "best" model isn't always the most powerful one. It's the one that perfectly aligns with your specific goals for security, performance, and cost. Nail this decision, and the rest of the build will be much smoother.
Preparing Your WordPress Environment
No matter which model you choose, you need to get your WordPress site ready. First thing's first: make sure you have full administrator permissions. You'll need them to install plugins and tweak settings.
If you're going the local route, double-check that your server meets the CPU, RAM, and GPU requirements listed in the model's documentation. Getting these technical details sorted out now will save you from some major headaches later.
The good news is that the cost to get a chatbot up and running is more flexible than ever, with projects ranging anywhere from $5,000 to over $500,000, all depending on how complex you want to get.
Getting MxChat Installed and Your AI Model Hooked Up
Alright, you’ve got your strategy sorted. Now it's time to roll up our sleeves and get this thing built. We'll start by getting the MxChat plugin installed on your WordPress site and then connect it to the AI brain you've chosen. The whole process is pretty straightforward, but paying attention to a few details here will save you headaches later.
First things first, let's get the plugin itself. Head over to your WordPress dashboard and navigate to Plugins > Add New. In the search bar, just type in "MxChat." Once you find it, install and activate it. You'll see a new MxChat menu item pop up on your dashboard—that’s your new command center for everything chatbot-related.
After you activate it, you'll land on the main plugin screen, which looks like this:
This is where the magic begins. The interface is designed to walk you through creating your first bot and connecting your AI model without having to write a single line of code.
Connecting Your Chosen AI Model
With MxChat installed, the next critical step is to link it to your AI model. How you do this depends on whether you're using a cloud service or running a model locally.
- Cloud Models (like OpenAI or Anthropic): You'll need to grab an API key from your provider's website. Inside MxChat, go to the Settings > AI Models tab. Just pick your provider from the list and paste the API key into the field. This creates a secure handshake between your website and the AI.
- Local Models (like Llama 3): If you've got a model running on your own server, you'll need its API endpoint URL. You'll pop this URL into the local model settings within MxChat to tell the plugin where to find your AI.
This connection is what gives your bot its intelligence. If you want a more detailed walkthrough, especially for OpenAI, check out our guide on https://mxchat.ai/openai-api-wordpress-integration-enhance-with-mxchat/.
First Steps in Bot Configuration
Once your model is connected, you can create your first chatbot. This is where you start to define its job. Ask yourself, what is this bot’s primary function? Is it here for customer support? To capture leads? To guide people to the right product?
For instance, a customer support bot should probably be set up with a model that excels at factual accuracy and maintains a helpful, calm tone. On the other hand, a lead capture bot could be configured to be more conversational and proactive to draw users in.
My Two Cents: Don't be shy about experimenting right from the get-go. Try creating two bots connected to the same model but give them slightly different initial instructions (these are called system prompts). Pit them against each other and see which one performs better for your specific goals.
This initial setup is the foundation for everything else, from building its knowledge base to crafting its unique personality. The ease of creating bots like this is a big reason why automated traffic is surging. By 2024, bots accounted for a staggering 51% of all internet activity, overtaking human traffic for the first time in a decade. Now that your bot is installed and connected, you're ready to start building its brain.
Building Your Bot's Brain: A Powerful Knowledge Base
An AI model is a powerful engine, but it's pretty useless without fuel. For your chatbot, that fuel is its knowledge base—the curated collection of documents, data, and website content that gives it something smart and relevant to say. This is where you transform a generic AI into an expert on your business.
MxChat makes this part of the process surprisingly easy. You can feed your bot all sorts of information to build a solid understanding of your company, products, and how you operate.
Feeding Your Bot the Right Information
The quality of your bot's answers hinges entirely on the quality of the information you give it. Think about it like training a new hire. You wouldn't just hand them a random stack of papers and hope for the best. You'd give them organized, clear, and relevant materials.
Here's what you can upload directly into MxChat to start building its brain:
- PDF Documents: These are perfect for the heavy lifting. Think product manuals, company handbooks, service agreements, or detailed technical guides.
- Text Files: Got a simple FAQ list or a company history write-up? Text files are ideal for straightforward, plain-text information.
- Website Content: This is a huge time-saver. Just provide a sitemap URL, and MxChat will crawl and index your entire site, learning directly from your pages and blog posts.
This mix-and-match approach lets you create a bot that knows as much about your business as your most experienced support agent. If you want to go deeper, we've written a whole guide on building a knowledge base chatbot to enhance your WordPress site.
Structuring Your Documents for AI Success
I can tell you from experience that how you structure your source documents makes a massive difference. An AI can easily get tripped up by messy, chaotic files. A few small formatting tweaks beforehand can save you a lot of headaches later.
To get the best possible results, always prep your documents with clarity in mind.
- Use Clear Headings and Subheadings: Break up long documents into logical chunks with descriptive headings (H1, H2, H3). This creates a roadmap for the AI, helping it pinpoint the right information instantly.
- Embrace Simple Lists: Bullet points and numbered lists are your best friends. They are far easier for an AI to understand and pull from than a dense wall of text.
- Keep it Focused: If you have a single document covering three or four different topics, split it up. A PDF dedicated only to your "Return Policy" will always perform better than a general-purpose document that also crams in shipping details and warranty info.
Pro Tip: Before uploading a big PDF, give it a quick "human scan." If you struggle to find a specific piece of information quickly, the AI will too. A little simplification before you upload goes a long way.
Keeping Your Knowledge Base Fresh
Building a bot isn't a "set it and forget it" project. Your AI assistant is only as good as its last update. A chatbot that gives out old pricing or talks about a discontinued product can cause real problems and erode customer trust.
Set up a simple schedule for reviewing and updating your knowledge base materials. If you're constantly launching new products, sync your bot updates with your launch calendar. For most other businesses, a quarterly review of all source documents is a great practice. It ensures your bot stays accurate, helpful, and an indispensable resource for your customers.
Giving Your Chatbot a Unique Personality
Now that your chatbot is loaded with your company's knowledge, it's time for the fun part: giving it a soul. A generic, robotic assistant can answer questions, sure. But a bot with a distinct personality creates a memorable experience, builds real trust, and keeps people coming back. This is where you transform a simple tool into what feels like a helpful team member.
MxChat makes this easy with a powerful feature called the system prompt. Think of this as your bot's core mission statement or a permanent set of instructions that guides its behavior, tone, and communication style in every single conversation.

It's amazing what a few well-chosen sentences can do. This isn’t just about making the bot sound "friendly"—it’s about meticulously aligning its voice with your brand's identity.
Crafting a Persona with System Prompts
Let's look at a couple of real-world scenarios to see how this works in practice.
Imagine you run a software company and need a support agent who is both professional and empathetic. Your system prompt could be something like this:
Professional Support Agent Persona:
"You are Alex, a friendly and professional support specialist for our company. Your tone should always be patient, clear, and helpful. Prioritize providing accurate solutions based on the knowledge base. If you don't know an answer, politely say so and offer to connect the user with a human agent."
This prompt gives the bot a name (Alex), establishes a professional yet helpful tone, and even provides a clear rule for what to do when it's stumped.
Now, let's flip the script. Picture an e-commerce brand with a much more playful, informal voice:
Witty Brand Guide Persona:
"You are Sparky, our store's enthusiastic and witty guide. Your tone is informal and fun. Use emojis where appropriate and get excited about our products. Your goal is to help users find the perfect item and make them smile. Stick to our product catalog and company info only."
See the difference? These simple instructions create two completely different user experiences. One is all about efficient, clear support, while the other is about creating a fun shopping journey. For more ideas on how to get started, check out our guide on the best practices for naming your AI chatbot.
Customizing the Visual Experience
Of course, personality isn't just about the words on the screen. It’s also about how the chatbot looks and feels on your website. MxChat gives you full control over the chat widget's appearance so it blends seamlessly with your site's branding.
You can tweak several key elements:
- Widget Colors: Adjust the header, background, and even the message bubble colors to match your site’s palette perfectly.
- Custom Avatar: This is huge. Upload your company logo or a custom character image to give your bot a face.
- Greeting Message: The very first thing a user sees. Customize the initial message that pops up to set the right tone from the get-go.
By combining a well-defined persona in the system prompt with a visually integrated chat widget, you elevate your bot from a simple script to a true digital brand ambassador. It's this level of detail that separates a forgettable bot from one that genuinely makes the customer's journey better.
Putting Your New Bot to Work on WordPress
You've built your bot, filled it with knowledge, and given it a unique personality. Now for the exciting part: setting it loose on your website so it can start helping visitors. This final step is all about strategic placement. It’s one thing to create a smart chatbot, but it's another to make sure it shows up in the right places at the right times to actually be useful. Thankfully, MxChat makes this incredibly simple with its shortcode system.
Just head over to your MxChat dashboard, find the bot you want to deploy, and grab its unique shortcode. From there, you can paste it pretty much anywhere in WordPress—a specific page, a blog post, or even a sidebar widget. This gives you precise control over where your new AI assistant will appear.
Where Should You Place Your Bot?
While dropping the chatbot onto every single page is an option, a more thoughtful approach usually gets better results. Take a moment to think about your website from a visitor's perspective. Where are the common friction points? Where do people get stuck or need a quick question answered before they can move forward?
Here are a few high-impact spots I always recommend considering:
- The Main Support or FAQ Page: This one's a classic. Placing a bot here acts as a first line of defense, instantly handling common questions and freeing up your human support team for the more complex stuff.
- Key Product or Service Pages: Think of the bot as a virtual sales clerk. On a busy product page, it can answer questions about features, stock, or shipping, potentially nudging a hesitant buyer over the finish line.
- The Pricing Page: Anyone on your pricing page is a serious prospect. A chatbot can clarify the differences between tiers, explain specific features, and address any last-minute doubts that might prevent them from signing up.
There's a reason the chatbot market is exploding. Businesses are seeing tangible returns from these kinds of targeted, helpful interactions. Projections show the market could hit anywhere from $9.56 billion to $19.39 billion by 2025, with some estimates reaching $27.29 billion by 2030. This growth is all about AI’s increasing ability to handle these crucial customer conversations. You can dig into more of the data behind this trend over at Grand View Research.
Getting Fancy with Conditional Rules
If you want to get even smarter with your bot placement, you can tap into conditional display rules. Most modern WordPress page builders and some plugins let you show or hide content based on specific criteria. For instance, you could set up a rule so the chatbot only appears on blog posts within your "Technical Guides" category, ensuring it’s there to help when it’s most needed.
Another powerful tactic is to link the bot's appearance to a specific marketing effort. Imagine creating a rule that only shows the chatbot to visitors who land on your site from a particular Google Ads campaign. You could even customize its greeting to be hyper-relevant to that ad, creating a seamless and personalized experience.
The Pre-Launch Checklist
Before you hit "Publish" and let your bot out into the wild, it pays to run through a quick final check. Trust me, catching a small issue now is way better than letting a real visitor find it. This is a quick version of the checklist I use myself.
My Personal Go-Live Checklist:
- Run a Few Test Chats: Does the conversation flow naturally? Is the personality coming through correctly? Try asking the same question a few different ways to see how it responds.
- Fact-Check the Knowledge Base: Ask it questions where you already know the answer. Is it pulling the correct, up-to-date info from your documents?
- Check on Mobile: This is non-negotiable. Open the page on your phone. Is the chat widget easy to see and use? Does it block any important buttons or text?
- Test the "Escape Hatch": If you have an option to escalate to a human, test it. Make sure the handoff process is smooth and works exactly as you intended.
Spending just ten minutes on these final checks can make all the difference. It ensures that from the very first interaction, your new bot is ready to make a great impression and genuinely help your visitors.
Common Questions About Making a Bot with MxChat
Even with a tool as straightforward as MxChat, jumping into the world of AI chatbots for the first time will naturally spark a few questions. You're dealing with knowledge bases, user experience, and AI models, so it's normal to have some "what ifs."
Let's walk through some of the most common things people ask when they're building their first bot. These answers come from our experience helping countless users get their chatbots up and running.
Can I Use a Free AI Model?
You sure can. MxChat plays nicely with locally hosted, open-source models like Llama 3 or Mistral. The models themselves are free to download, but there's a catch: you'll need a server with a powerful enough GPU to run them.
So, while you're dodging the recurring API fees from cloud providers, you do have to factor in the cost of that hardware or specialized hosting. It’s a great route to take if data privacy is your top priority or if you just want to experiment without worrying about API bills, assuming you've got the necessary gear.
How Do I Stop My Bot from Answering Off-Topic Questions?
Your best friend here is a carefully written system prompt. This is where you give your bot its core instructions. Inside MxChat, you can explicitly tell the bot to only answer questions using the documents you've loaded into its knowledge base.
You can also tell it how to respond when a question goes off the rails.
For example, a simple line in your system prompt can work wonders: "Only use the provided documents to answer the user's question. If the answer isn't in the documents, state that you do not have that information and offer to connect them with a human agent." This one rule keeps the bot from guessing or pulling in outside information, ensuring it stays on-brand.
This is how you turn a generic AI into a reliable, company-approved source of information.
Will a Chatbot Slow Down My WordPress Site?
That's a great question, and we hear it a lot. The short answer is no. We built MxChat from the ground up to be incredibly lightweight. The chat widget that appears on your site has a tiny footprint and won't hurt your page load times.
All the heavy lifting—the actual AI processing—happens somewhere else. It's either handled by a cloud API (like OpenAI's) or on your own dedicated server if you're self-hosting a model. Since that work is done off-site, it doesn't bog down your visitor's browser or slow down your website's performance.
How Often Should I Update the Knowledge Base?
There’s no single answer here; it really depends on how often your business information changes. The best approach is to tie your knowledge base updates to your regular business cycles.
- Product documentation? You should probably update the knowledge base every time you roll out a major product update or add a new feature.
- Company policies or marketing FAQs? A quick quarterly review is usually enough to catch anything that's become outdated.
The goal is to create a simple maintenance routine you can stick with. That consistency is what keeps your bot's answers accurate and genuinely helpful for your customers over time.
Here's a quick summary of those common questions.
undefined
| Question | Short Answer |
|---|---|
| Can I use a free AI model? | Yes, if you have a server with enough GPU power to run it locally. |
| How do I keep my bot on topic? | Use a strong system prompt to restrict its answers to your knowledge base. |
| Will it slow down my website? | No, MxChat is lightweight, and all the heavy AI processing is done off-site. |
| How often should I update it? | Sync updates with your business changes, like new products or policy updates. |
Hopefully, this clears up some of the initial hurdles you might encounter.
Ready to start making a bot that transforms your customer experience? With MxChat, you can deploy an intelligent, no-code AI assistant on your WordPress site in minutes. Get MxChat today and automate your success.